Open post

Stay Safe While Upgrading: A Beginner’s Guide to Installing Camaro Headers

If you’ve been looking to boost your Camaro’s performance, upgrading to aftermarket Camaro headers is one of the most popular modifications. Not only do headers improve horsepower and torque, but they also give your car that deep, aggressive exhaust note muscle car enthusiasts love. But before you dive into an install, safety should be your top priority. Whether you’re wrenching in your home garage in Texas or setting up shop in a California driveway, the right approach keeps you safe and helps you get the most out of your upgrade.

This guide is designed for beginners who want to enjoy the performance benefits of headers while making sure every step is done safely. We’ll cover essential tools, protective gear, safe lifting techniques, and what to expect once your new headers are installed.

Understanding Camaro Headers

What Are Headers?

Headers are performance exhaust components designed to replace the restrictive stock exhaust manifolds. Their job is to channel exhaust gases more efficiently out of the engine, reducing backpressure and freeing up horsepower.

Why Upgrade?

  • Increased horsepower and torque
  • More efficient engine performance
  • Improved throttle response
  • That unmistakable V8 Camaro sound

Types of Headers

  • Short-tube headers: Easier to install, better for daily drivers, usually don’t require tune adjustments.
  • Long-tube headers: Offer greater power gains but are more complex to install, and they typically require a tune.

For many beginners, short-tube headers provide a good balance of performance and ease of installation.

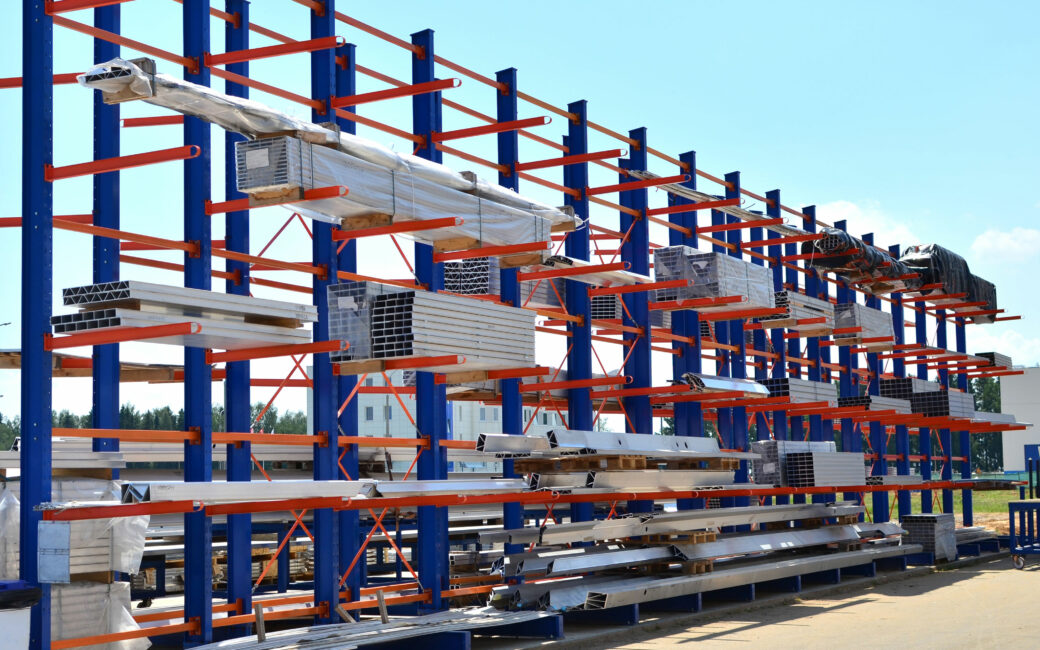
ALSO READ: Innovations in Cantilever Racking: Enhancing Safety and Efficiency

Safety First – Preparing for the Job

Before unbolting anything, you’ll want to make sure you’re fully prepared. That includes setting up your workspace, gathering tools, and wearing the right gear.

Work Area and Ventilation

Always work in a well-ventilated garage or outdoor space. Exhaust gases can contain harmful carbon monoxide, so it’s important to never run your car in a closed garage. If indoors, keep the garage door open and set up a fan to push fumes out.

The Right Tools for a Safe Install

A good install starts with having the right equipment. Below is a table of basic tools and safety gear you’ll want on hand:

Tools & EquipmentPurpose
Socket set & extensionsRemoving and installing bolts in tight spaces
Torque wrenchEnsures bolts are tightened to spec
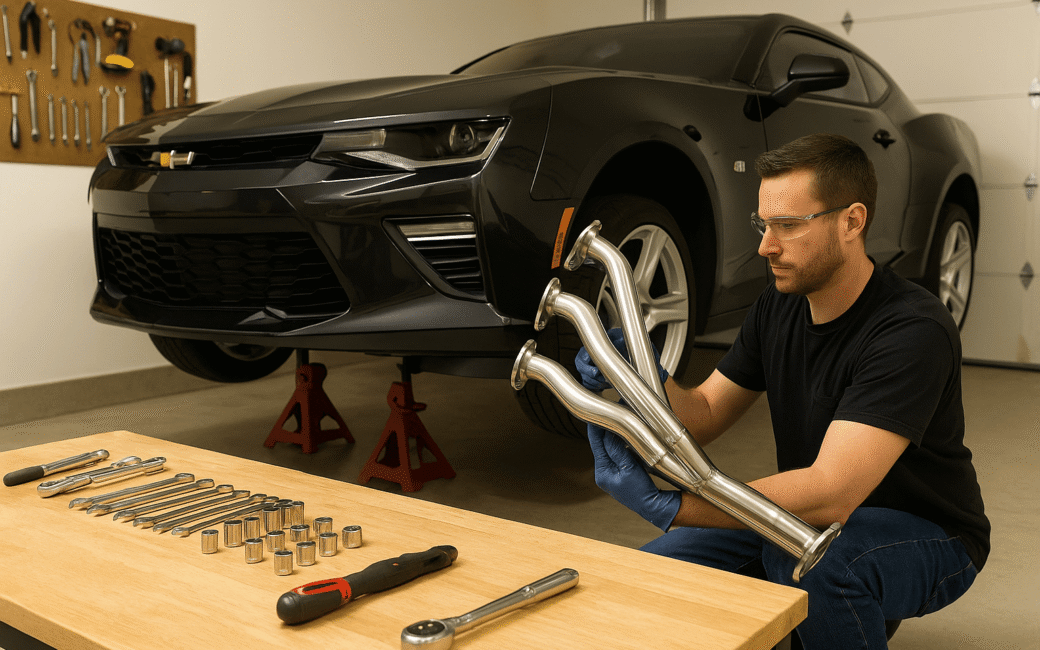
Jack & jack standsSafely lifting and supporting your car
Penetrating oilLoosens rusted or stuck bolts
Safety glassesProtects your eyes from debris
Mechanic glovesPrevents cuts and burns
Ear protectionUseful if using power tools
Long sleeves & pantsReduces risk of burns and scrapes

Protective Gear and Clothing

Treat this install like shop work. Wear gloves, glasses, and protective clothing. Long sleeves will protect against burns from hot engine parts, while gloves provide grip and shield your hands from sharp edges.

Step-by-Step Safety Guide for Installing Camaro Headers

Now that your work area and tools are ready, let’s go through the steps with safety in mind.

Lifting the Car Safely

Never rely on a hydraulic jack alone. Always use jack stands rated for your Camaro’s weight and place wheel chocks behind the tires. Ensure the car is on a flat surface before climbing underneath.

Removing Old Manifolds

  • Cool the car completely. Exhaust manifolds and nearby components can stay hot for hours after driving.
  • Use penetrating oil. Spray down rusted bolts in advance to avoid snapped studs.
  • Position safely. Avoid overreaching under the car. Position your body so you have leverage without strain.

Installing the New Headers

  • Follow torque specs. Overtightening can break bolts, while undertightening can cause leaks.
  • Check gasket placement. Misaligned gaskets lead to exhaust leaks.
  • Take your time. Rushing increases the risk of mistakes and injury.

Checking for Exhaust Leaks

After the install, start the engine in a ventilated area. Listen closely for ticking sounds around the headers, which may indicate a leak. Recheck torque after a few heat cycles, as bolts can loosen once the engine heats up and cools down.

Post-Installation Safety Tips

Heat Management

Headers get extremely hot. Adding heat shields or header wraps reduces the chance of burns and helps protect nearby wiring and components. If you’re using long-tube headers, this step is especially important.

Street vs. Track Use

While headers boost performance, remember that long-tube setups may not pass emissions tests in some states. Always check your local laws. For daily driving, stick with setups that keep your Camaro legal on public roads.

Regular Maintenance and Inspections

Headers require periodic checks:

  • Retorque bolts every few months.
  • Inspect for leaks or cracks.
  • Watch for unusual noises that could indicate exhaust leaks.

Just like oil changes or brake checks, header maintenance should become part of your Camaro care routine.

Performance Benefits of Camaro Headers

So why go through all this effort? Because the rewards are worth it. A properly installed set of headers can transform the way your Camaro feels on the road.

  • Horsepower Gains: Depending on your setup, you could see anywhere from 10–30 additional horsepower.
  • Improved Sound: Headers give your Camaro a deeper, throatier exhaust tone.
  • Throttle Response: Better exhaust flow translates into quicker acceleration.
  • Engine Efficiency: Reduced backpressure means your engine doesn’t work as hard to push gases out.

If you’re shopping for the right parts, you can browse options like Camaro headers that balance performance and reliability.

Final Thoughts

Installing headers is one of the most satisfying upgrades you can do on a Camaro. The performance gains are real, the sound is addictive, and the sense of accomplishment is unmatched. But the key is staying safe every step of the way. Work in a ventilated area, use the right tools, wear protective gear, and never cut corners when lifting your car or tightening bolts.

If you’re unsure about tackling the job yourself, consider working with a professional mechanic. A safe, properly installed set of Camaro headers will give you years of performance and enjoyment on the street or track.

FAQ

Do I need a tune after installing Camaro headers?
If you’re installing long-tube headers, yes, a tune is usually recommended for optimal performance and to avoid check engine lights. Short-tube headers often work fine without tuning.

How long does it take for a beginner to install headers?
Expect 6–10 hours, depending on your tools and experience. Plan for a full day.

Are long-tube headers safe for daily driving?
Yes, but they can raise emissions issues in some states. Always check local regulations.

Open post

Top 5 Ways to Stay Safe in Crowded Places

Imagine you’re elbow-to-elbow at a Toronto Maple Leafs game, weaving through the bustling Granville Island Market in Vancouver, or riding a packed Montreal Metro during rush hour. Canada’s vibrant cities and events draw crowds, bringing energy and excitement—but also risks. Whether it’s pickpocketing at the Calgary Stampede or navigating a snowy exit during a power outage, crowded places demand a sharp eye and a smart plan. At staysafestayback.ca, we’re all about keeping you secure without dampening the fun. That’s why we’ve put together five practical, Canadian-focused tips to help you stay safe in busy environments. From keeping your distance to knowing your exits, here’s how to enjoy the chaos with confidence.

Keep a Safe Distance

Crowds can feel like a pressure cooker—too close, and things get dicey. Maintaining a safe distance isn’t just about comfort; it’s a shield against theft, confrontations, and even seasonal bugs like the flu, which hit hard during Canada’s chilly months. In a packed mall or at a concert, a little space goes a long way.

Here’s how to do it:

  • Aim for an arm’s length: Whenever possible, keep about a meter between you and others. It’s enough to dodge a sneaky hand or an accidental shove.
  • Use props wisely: Carry a shopping bag or wear a backpack (on your front in tight spots) to create a natural barrier.
  • Stay fluid: If someone’s creeping too close, shift your position—step aside or pivot to reclaim your bubble.

In Canada, this tip shines at winter events like Quebec City’s Winter Carnaval, where thousands bundle up and cram into snowy streets. Those extra layers aren’t just for warmth—they’re a built-in buffer. Heading to a rink-side seat for a Senators game in Ottawa? A step back from the railing could mean the difference between enjoying the goal and losing your wallet. Next time you’re shoulder-to-shoulder, take a breath and take a step back—it’s a small move with big impact. For more on personal safety habits, check out our guide on building a safety-first mindset.

Know Your Exits

When you’re in a sea of people, knowing how to get out fast isn’t just smart—it’s essential. Fires, power outages, or sudden panics can turn a fun outing into a scramble, and in Canada’s big venues, like Toronto’s Rogers Centre or Vancouver’s BC Place, exits aren’t always obvious. A quick scan can save you precious seconds.

Try these steps:

  • Spot exits on arrival: As soon as you enter, look for lit exit signs, stairwells, or side doors. Note at least two routes.
  • Think beyond the main path: Crowds bottleneck at obvious exits—find a secondary option, like a service door or side hall.
  • Practice mentally: Picture yourself moving to those exits. It’s muscle memory for your brain.

Canada’s weather adds a twist. Imagine a snowstorm hitting during a Winnipeg Jets game—icy exits could slow everyone down. Or picture a packed TTC station in Toronto during a blackout; knowing an alternate stairwell could keep you ahead of the crush. At the Edmonton Mall or a Halifax concert, take a minute to scope out escape routes. Make it a habit: spot two exits wherever you go, from malls to music festivals. Our emergency preparedness checklist has more tips to keep you ready.

Secure Your Belongings

Crowds are a pickpocket’s playground, and Canada’s tourist hotspots—like Niagara Falls, Banff, or Toronto’s Distillery District—are no exception. A moment’s distraction, and your phone or wallet’s gone. Securing your stuff keeps you in control.

Here’s a quick rundown:

  • Choose the right gear: Opt for a crossbody bag with a zipper or a money belt under your coat. Anti-theft backpacks work wonders for city commuters.
  • Reposition valuables: Keep wallets in front pockets, not back ones. Phones stay in zipped pouches, not loose hands.
  • Tone it down: Flashy watches or dangling bags scream “target”—stick to subtle, functional items.

At events like Toronto’s Caribana or Vancouver’s Lunar New Year parade, thieves thrive on the chaos. A friend once lost her purse at the Calgary Stampede—right out of an unzipped tote. Contrast that with a savvy traveler I met at Montreal’s Old Port who swore by a hidden neck wallet. The lesson? Zip it, tuck it, and keep it close—your stuff stays safe, and you stay stress-free. Dive deeper into protecting your gear with our personal security essentials.

Quick Belongings Checklist

ItemSafe OptionRisky Option
WalletFront pocketBack pocket
PhoneZipped pouchHand or open bag
BagCrossbody with zipperOpen tote
AccessoriesHidden under clothesVisible and flashy

Stay Aware of Your Surroundings

In a crowd, distractions are the enemy. Staring at your phone or blasting music through earbuds paints a bullseye on your back. Staying aware keeps you one step ahead of trouble.

Here’s how to sharpen your senses:

  • Eyes up: Scan the crowd every few minutes—watch for people moving oddly or lingering too long.
  • Ears open: Skip the headphones or keep one ear free to hear shouts, footsteps, or alarms.
  • Trust your gut: If something feels off—like a stranger brushing by twice—move away or alert someone.

On Toronto’s TTC subway or Edmonton’s LRT during rush hour, awareness can dodge a pickpocket or spot a brewing argument. I’ve seen it myself: a distracted tourist at Vancouver’s Stanley Park missed a bag snatch because her earbuds drowned out the footsteps. Contrast that with a commuter at Calgary’s CTrain who sidestepped trouble by noticing a shifty character early. Ditch the scroll for a scan—awareness is your first line of defense. For more on staying vigilant, see our situational awareness tips.

Travel Light and Smart

Dragging a suitcase through a crowd or juggling three bags at a festival is a recipe for stress—and a signal to opportunists. Traveling light keeps you nimble and less of a mark.

Try these tactics:

  • Pack essentials only: Stick to ID, cash, cards, and your phone—leave the rest at home or in a locker.
  • Consolidate: Use a small, secure bag or stuff pockets strategically. One item’s easier to guard than five.
  • Plan ahead: At venues like Canada Place or Ottawa’s ByWard Market, check for coat checks or stash spots.

Canada’s festival scene—like Montreal’s Jazz Fest or Halifax’s Busker Festival—proves the point. Lugging a bulky backpack through a throng slows you down and draws eyes. I once saw a guy at the Vancouver Folk Festival breeze through with just a fanny pack while others wrestled with overstuffed totes. Heading to Yonge-Dundas Square at rush hour? Pack like you’re ready to move: light, tight, and quick. Our travel safety guide has more on streamlining your load.

Conclusion

Crowded places are part of Canada’s charm—bustling markets, packed arenas, lively festivals—but they don’t have to mean chaos. With these five tips—keeping your distance, knowing your exits, securing belongings, staying aware, and traveling light—you’ve got a toolkit to navigate any throng. It’s the stay safe, stay back way: practical steps to enjoy public spaces without worry. Whether you’re braving the Stampede or hopping the SkyTrain, these habits let you focus on the fun, not the risks.

Got your own tricks for staying safe at Canada’s busiest spots? Share them in the comments—we’d love to hear how you handle the crowds at the Eaton Centre or a Habs game. Crowds don’t have to rattle you—stay smart, stay safe, and soak in Canada’s vibrant scenes.

Open post

Why ‘Stay Safe, Stay Back’ Matters: Protecting Yourself Around Commercial Vehicles

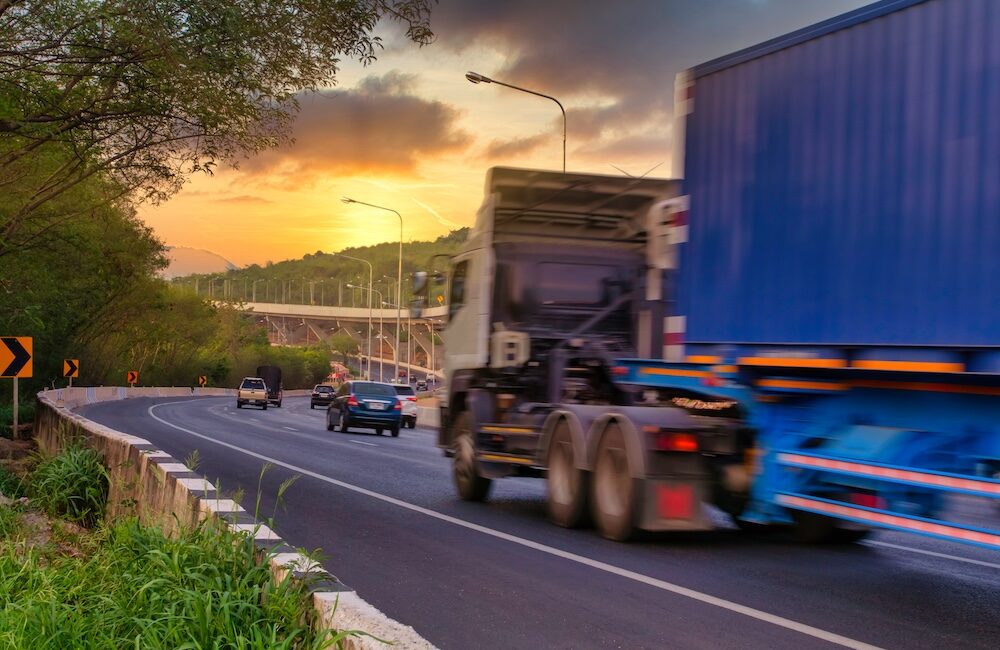
Road safety is a shared responsibility, and understanding how to navigate safely around commercial vehicles is a vital part of that. Large trucks and buses operate differently from regular passenger vehicles—they have bigger blind spots, require more stopping distance, and take longer to maneuver. For residents of Vancouver and across Canada, staying safe around these vehicles can help reduce accidents and protect lives.

The ‘Stay Safe, Stay Back’ campaign highlights the importance of maintaining a safe distance from commercial vehicles, whether you’re driving, cycling, or walking. In this article, we’ll explore why staying back matters and provide practical tips to help you avoid risks and share the road safely.

Understanding the Unique Challenges of Commercial Vehicles

Size and Weight

Commercial vehicles, especially trucks, are significantly larger and heavier than passenger cars. A fully loaded semi-truck can weigh up to 36,000 kilograms, making it much harder to stop quickly or swerve to avoid obstacles. In urban areas like Vancouver, where traffic congestion is common, these challenges become even more pronounced.

Blind Spots

Large trucks and buses have extensive blind spots, also known as “no zones,” where the driver has limited or no visibility. These blind spots are located:

  • Directly behind the vehicle.
  • Along both sides, especially near the rear wheels.
  • In front of the vehicle, particularly for taller cabs.

If you’re in one of these areas, the driver may not see you, increasing the risk of a collision.

Turning Radius

Commercial vehicles require a wider turning radius, which often means encroaching on adjacent lanes or bike paths. This can catch other road users off guard, especially at intersections.

Stopping Distance

Unlike passenger cars, large trucks need much more time and space to come to a complete stop. A truck traveling at highway speeds may require the length of two football fields to stop safely. Following too closely behind can lead to rear-end collisions if the truck stops suddenly.

Innovations in Cantilever Racking: Enhancing Safety and Efficiency

Why Staying Back Matters

Avoiding Blind Spots

Staying out of a truck’s blind spots is one of the most critical safety measures. If the driver can’t see you, they can’t react to your presence, putting you at risk of being sideswiped or hit during lane changes or turns.

Allowing Space for Maneuvering

Commercial vehicles need extra room to change lanes, merge, or turn. By maintaining a safe distance, you give drivers the space they need to operate their vehicles safely.

Preventing Rear-End Collisions

Tailgating a large truck or bus is extremely dangerous. If the truck stops suddenly, your vehicle may not have enough time to react, leading to a rear-end collision that could be catastrophic due to the size and weight difference.

Reducing Stress for Drivers

Commercial drivers already face significant challenges on the road, from tight delivery schedules to navigating busy streets. Giving them space to operate not only reduces risks but also helps lower their stress levels, contributing to safer roads for everyone.

What You Need to Know About Heavy Truck Roads for Cyclists

Tips for Drivers

Stay Out of Blind Spots

Make sure you’re visible to the driver at all times. A good rule of thumb is: if you can’t see the truck’s mirrors, the driver can’t see you.

Follow the “Two-Second Rule”

Maintain a minimum of two seconds of distance between your vehicle and the commercial vehicle ahead. In bad weather, increase this to four or more seconds to account for slippery roads.

Avoid Cutting in Front

Never merge directly in front of a large truck or bus. These vehicles need more stopping distance, and cutting in front of them can lead to a collision if the driver can’t stop in time.

Be Patient During Turns

When a truck or bus is making a wide turn, give it the space it needs. Trying to squeeze past on the inside can be extremely dangerous.

Tips for Cyclists

Stay Visible

Cyclists should position themselves where truck and bus drivers can see them, especially at intersections. Avoid riding directly alongside a truck, as you may be in a blind spot.

Avoid Riding Alongside Turning Trucks

If a truck is signaling a turn, hold back and let it complete the maneuver. Wide turns can sweep across bike lanes or shoulders, putting cyclists in harm’s way.

Use Hand Signals

Clearly indicate your intentions when riding near commercial vehicles. Hand signals help drivers anticipate your movements and react accordingly.

Tips for Pedestrians

Cross Safely

Always use marked crosswalks and wait for large vehicles to pass before stepping onto the road. Avoid crossing in front of a truck or bus where the driver may not see you.

Stay Alert

Keep your focus on your surroundings, especially when walking near busy intersections or loading zones. Avoid distractions like headphones or smartphones that can limit your awareness.

Don’t Assume Visibility

High cabs on trucks and buses can make it difficult for drivers to see pedestrians directly in front of or alongside their vehicles. Make eye contact with the driver before crossing to ensure they’ve seen you.

The Role of Awareness Campaigns Like ‘Stay Safe, Stay Back’

Education and Outreach

Campaigns like ‘Stay Safe, Stay Back’ play a vital role in educating the public about road safety around commercial vehicles. Through outreach programs, social media, and community events, they spread awareness about the unique challenges of sharing the road with large vehicles.

Collaboration with Drivers

Commercial vehicle drivers are often involved in these campaigns, sharing their experiences and providing valuable insights into how road users can stay safe.

Reducing Accidents and Fatalities

By promoting safe practices, awareness campaigns help reduce accidents involving commercial vehicles. For example, similar initiatives in Canada have shown measurable decreases in collisions when public awareness improves.

Common Misconceptions About Commercial Vehicle Safety

“Trucks Can See Everything”

Many people assume that truck drivers have a clear view of the road around them. In reality, blind spots are a significant limitation, and drivers rely on others to stay visible.

“I Can Stop Quickly If Needed”

Some drivers believe they can follow closely behind a truck because they’ll have time to react. This mindset is dangerous, as trucks often stop unexpectedly or require sudden maneuvers.

“It’s Safe to Overtake Trucks Aggressively”

Unsafe passing behaviors, like cutting in too closely, can create hazardous situations. Giving trucks plenty of space when overtaking is essential for everyone’s safety.

Conclusion

Staying safe around commercial vehicles requires understanding their unique challenges and taking proactive steps to avoid risks. Whether you’re driving, cycling, or walking in Vancouver, maintaining a safe distance from large trucks and buses is critical to protecting yourself and others on the road.

The ‘Stay Safe, Stay Back’ campaign serves as an important reminder that small changes in behavior can have a big impact on road safety. By staying out of blind spots, giving commercial vehicles room to maneuver, and practicing patience, we can all contribute to safer roads across Vancouver and Canada.

Take a moment to share this message with friends and family—it could save a life. Let’s work together to make our streets safer for everyone.

Open post

Exploring the Kettle Valley Rail Trail: A Journey Through BC’s Cycling Gem

The Kettle Valley Rail Trail, a historic gem in the heart of British Columbia, offers a unique cycling adventure that combines rich history with breathtaking natural beauty. This iconic trail, once a vital railway system, has been transformed into a scenic cycling route that winds through some of the most picturesque landscapes in the province. In this article, we’ll dive into the history and beauty of the Kettle Valley Rail Trail, providing valuable tips for planning your trip, showcasing trail highlights, and suggesting nearby attractions.

Section 1: The History of the Kettle Valley Rail Trail

The Kettle Valley Rail Trail owes its existence to the ambitious railway development of the late 19th century. The trail’s history dates back to the early 20th century when the Canadian Pacific Railway (CPR) undertook the monumental task of constructing a rail line through the challenging terrain of British Columbia. The Kettle Valley Railway was a critical part of this network, built between 1910 and 1915 to link southern BC with the Kootenay region.

Over the years, the railway played a vital role in transporting goods, mining resources, and connecting communities. However, as transportation needs evolved, the rail line gradually fell into disuse. In the 1990s, a visionary effort began to transform the abandoned rail bed into a recreational trail. Today, the Kettle Valley Rail Trail stands as a testament to both the ingenuity of its builders and the dedication of those who preserved it for future generations.

Section 2: Planning Your Kettle Valley Rail Trail Adventure

Best Time to Visit

Before embarking on your Kettle Valley Rail Trail adventure, it’s essential to consider the best time to visit. The trail is generally accessible from late spring to early fall. However, late spring and early fall offer more pleasant weather with fewer crowds.

Trail Permits and Accommodations

To make the most of your journey, check for any required trail permits, especially if you plan to camp along the route. There are various campgrounds and accommodations available near the trail, but it’s advisable to book in advance during peak seasons.

Transportation Options

Getting to the trailhead is an important logistical consideration. Depending on where you plan to start your journey, you may need to arrange transportation to the trailhead or back from your endpoint. Explore transportation options like shuttle services or bike rentals.

Section 3: Navigating the Kettle Valley Rail Trail

The Kettle Valley Rail Trail stretches over 600 kilometers, offering cyclists a diverse range of landscapes and experiences. The trail is divided into several sections, each with its unique characteristics:

  • Myra Canyon: Known for its breathtaking trestle bridges, this section is a must-visit. The views from these historic wooden structures are nothing short of awe-inspiring.
  • Chute Lake: This part of the trail offers challenging terrain and remote wilderness. It’s perfect for adventurous cyclists looking to escape into the backcountry.
  • Kootenay Boundary: This southern section of the trail takes you through rolling hills and vineyards, offering a more leisurely cycling experience.

The trail’s surface varies from gravel to dirt and can be uneven at times. While it’s generally suitable for cyclists of all levels, it’s essential to check trail conditions before setting out.

Section 4: Scenic Highlights Along the Way

One of the Kettle Valley Rail Trail’s greatest appeals is its stunning scenery. Here are some of the highlights you can expect:

  • Okanagan Lake Views: As you cycle through the Myra Canyon section, you’ll be treated to panoramic views of Okanagan Lake and the surrounding valley.
  • Trestle Bridges: Myra Canyon boasts a series of trestle bridges that span deep gorges, providing dramatic vistas of the rugged landscape.
  • Vineyards and Orchards: In the Kootenay Boundary section, you’ll pass through vineyards and orchards, offering opportunities to savor local wines and fresh produce.

Section 5: Must-Visit Attractions Near the Kettle Valley Rail Trail

While the trail itself is a fantastic experience, there are also several attractions and activities worth exploring in the areas surrounding the Kettle Valley Rail Trail:

  • Historic Towns: Stop by historic towns like Kelowna, Penticton, and Nelson to soak in their rich history, vibrant culture, and local cuisine.
  • Wineries: The Okanagan Valley is known for its wineries. Take a detour and enjoy wine tasting at some of the region’s renowned vineyards.
  • Provincial Parks: Visit provincial parks like Myra-Bellevue Provincial Park and Johnstone Creek Provincial Park for hiking, picnicking, and wildlife watching.

Section 6: Tips for a Safe and Enjoyable Ride

Safety is paramount when cycling the Kettle Valley Rail Trail. Here are some essential tips to ensure a safe and enjoyable journey:

  • Hydration: Carry enough water, especially during hot summer days, as water sources can be limited along the trail.
  • Protective Gear: Wear appropriate gear, including a helmet and padded cycling shorts for comfort on long rides.
  • Wildlife Awareness: Be mindful of wildlife encounters, especially in remote sections of the trail. Keep a safe distance and never feed or approach animals.
  • Leave No Trace: Practice Leave No Trace principles to minimize your environmental impact. Pack out all trash and respect the natural surroundings.

Section 7: Personal Experiences and Stories

To truly capture the essence of the Kettle Valley Rail Trail, here are some personal stories and experiences from cyclists who have embarked on this unforgettable journey:

  • Janet’s Adventure: Janet, an avid cyclist, shares her exhilarating ride through Myra Canyon, detailing the thrill of crossing the trestle bridges and the serenity of the natural surroundings.
  • Tom’s Solo Trek: Tom recounts his solo cycling adventure through the remote Chute Lake section, where he found solace in the rugged wilderness and self-discovery.

Conclusion

The Kettle Valley Rail Trail offers an unparalleled blend of history, natural beauty, and outdoor adventure. It’s a journey that allows you to connect with British Columbia’s past while immersing yourself in its stunning landscapes. As you plan your own Kettle Valley Rail Trail adventure, remember to respect nature, preserve the trail’s beauty, and leave a positive impact for future generations of cyclists to enjoy.

Closing Thoughts

Thank you for joining us on this virtual tour of the Kettle Valley Rail Trail. We hope this article inspires you to embark on your own cycling adventure along this iconic route. If you have any questions or would like to share your experiences, please feel free to leave a comment below. Safe cycling and happy trails!

Open post

Innovations in Cantilever Racking: Enhancing Safety and Efficiency

Introduction

Cantilever racking systems have long played a pivotal role in the world of industrial storage. Warehouses and manufacturing facilities rely on them to efficiently store and manage an array of long, bulky, and irregularly shaped items, such as lumber, pipes, and steel bars. However, as the demands of modern logistics and supply chain management continue to evolve, so too must the technology that underpins these essential storage solutions. 

This article delves into the exciting realm of innovations in cantilever racking systems, particularly those designed to enhance safety and efficiency. We will explore the latest technological advancements that have revolutionized the way we approach storage, ensuring not only the protection of valuable inventory but also the optimization of warehouse operations. As we navigate through these innovations, we will provide relevant statistics, real-life examples, and practical insights to support our claims and make the topic relatable to both industry professionals and enthusiasts.

The Evolution of Cantilever Racking

For decades, traditional cantilever racking systems have served as the go-to solution for businesses dealing with long and unwieldy inventory. While they offered advantages in terms of accessibility and versatility, these systems also came with inherent limitations, particularly in terms of safety and efficiency.

In the early days of cantilever racking, accidents and collapses were not uncommon. Overloaded racks and improper load distribution could lead to catastrophic consequences. Additionally, the manual monitoring and management of these systems required significant time and effort, often resulting in operational inefficiencies.

As the need for safer and more efficient storage solutions became evident, manufacturers and engineers began to innovate, leading to the introduction of technologies that would redefine the capabilities of cantilever racking systems.

Smart Sensors in Cantilever Racking

Smart sensors represent a significant leap forward in cantilever racking technology. These sensors, often equipped with advanced capabilities, have become invaluable tools in preventing accidents and optimizing storage operations. Here’s how they work and why they matter:

Load Sensors

   – Load sensors are designed to measure the weight and distribution of loads on cantilever racking arms.

   – They provide real-time data on the load’s weight, helping to prevent overloading and ensuring compliance with load capacity specifications.

   – In the event of an overload, these sensors trigger alerts or automatically redistribute the load to prevent damage or collapse.

Proximity Sensors

   – Proximity sensors are strategically placed throughout the racking system to detect the presence of personnel or objects in close proximity.

   – They contribute to safety by alerting workers when they are too close to the racking system, reducing the risk of accidents.

   – Some advanced systems can even trigger automated slowdowns or stops of moving equipment when individuals or objects are detected nearby.

Temperature Sensors

   – Temperature sensors are especially critical for warehouses storing temperature-sensitive goods.

   – They monitor environmental conditions within the storage facility and can detect temperature fluctuations.

   – In the event of temperature anomalies, these sensors can trigger alerts to prevent damage to sensitive inventory.

The integration of smart sensors not only enhances safety but also contributes to operational efficiency. Real-time data collected by these sensors can be used to make informed decisions about load distribution, storage optimization, and preventive maintenance. The result is a more efficient and responsive storage system that reduces downtime and improves overall productivity.

Automated Load Monitoring

One of the cornerstones of modern cantilever racking innovation is automated load monitoring. This technology addresses the age-old challenge of ensuring that weight limits are not exceeded, reducing the risk of structural damage and accidents. Here’s why automated load monitoring is a game-changer:

Importance of Load Monitoring

   – Cantilever racking systems have specified load capacities to prevent structural failures.

   – Overloading can lead to catastrophic accidents, putting both personnel and inventory at risk.

   – Traditional manual load monitoring is prone to errors and may not provide real-time insights.

How Automated Load Monitoring Works

   – Automated load monitoring systems utilize load sensors, as mentioned earlier, to continuously measure the weight on each racking arm.

   – These systems are connected to a central control unit that receives data in real-time.

   – When the load approaches or exceeds safe limits, the system triggers visual and audible alerts, notifying workers and supervisors.

Preventing Overloading and Accidents

   – The real-time nature of automated load monitoring allows for immediate intervention.

   – Workers can quickly redistribute or remove excess weight, preventing overloading and potential accidents.

   – This proactive approach enhances safety and minimizes the risk of damage to inventory and infrastructure.

Operational Efficiency

   – Beyond safety benefits, automated load monitoring contributes to operational efficiency.

   – It reduces the need for constant manual load checks, saving time and labor costs.

   – Managers can access historical data to optimize storage and distribution strategies.

Automated load monitoring has become an indispensable tool for warehouses and facilities that rely on cantilever racking systems. Its ability to prevent accidents, ensure compliance with load capacities, and streamline operations makes it a vital component of a safer and more efficient working environment.

Anti-Collapse Systems

Safety in cantilever racking goes beyond load monitoring and sensors; it extends to safeguarding against potential collapses. Anti-collapse systems are designed precisely for this purpose, providing an additional layer of protection. Here’s why these systems are crucial:

Understanding Anti-Collapse Systems

   – Anti-collapse systems are physical barriers or features installed on cantilever racking.

   – They are designed to prevent items from falling off the racking and potentially causing harm to personnel or damage to inventory.

   – These systems vary in design but share the common goal of enhancing safety.

Types of Anti-Collapse Systems

   – Mesh Panels: Mesh panels are installed on the back and sides of cantilever racking to create a protective enclosure.

   – Backstops Backstops are horizontal bars or beams positioned at the rear of the racking system to prevent items from sliding off.

   – Safety Pins: Safety pins are inserted into the racking arms to secure items in place, preventing accidental dislodgment.

Real-World Scenarios

   – Share examples of incidents or near-misses that could have resulted in accidents if not for the presence of anti-collapse systems.

   – Highlight how these systems effectively prevent items from falling, minimizing potential harm.

Complementary Safety Measures

   – Explain how anti-collapse systems work in tandem with other safety innovations like load sensors and smart sensors.

   – Emphasize the comprehensive safety net provided by these combined technologies.

Regulatory Compliance

   – Mention that in many regions, compliance with safety regulations requires the installation of anti-collapse systems.

   – Show that investing in these systems not only enhances safety but also ensures legal compliance.

Anti-collapse systems are a visible testament to the commitment to safety in warehouses and facilities utilizing cantilever racking. By preventing items from falling, these systems protect workers, inventory, and infrastructure, ultimately contributing to a safer and more efficient working environment.

Benefits of Implementing Innovative Cantilever Racking Systems

The integration of smart sensors, automated load monitoring, and anti-collapse systems offers a multitude of benefits:

– Enhanced Safety: Reduced risk of accidents, injuries, and inventory damage.

– Operational Efficiency: Minimized downtime, optimized storage, and streamlined workflows.

– Cost Savings: Lower maintenance costs, reduced labor expenses, and prevention of costly accidents.

– Regulatory Compliance: Adherence to safety regulations and standards.

The collective impact of these innovations is the creation of a safer and more efficient working environment.

Conclusion

Innovations in cantilever racking systems are transforming the landscape of industrial storage. The integration of smart sensors, automated load monitoring, and anti-collapse systems is ushering in an era where safety and efficiency go hand in hand.

By embracing these advancements, businesses can safeguard their workers, protect valuable inventory, and optimize warehouse operations. Moreover, the real-time data collected by these systems empowers decision-makers with insights that can drive continuous improvement.

As we move forward, it is imperative that industries prioritize the adoption of these innovations. In doing so, they not only meet safety standards and regulatory requirements but also set a higher standard for efficiency and productivity.

The statistics, real-life examples, and practical insights shared in this article underscore the tangible benefits of these innovations. Together, we can create safer, more efficient, and more prosperous work environments where cantilever racking is not just a storage solution, but a symbol of progress and innovation.

In embracing these technological advances, we’re not just enhancing cantilever racking; we’re creating a safer, more efficient future for industry and commerce.

Open post

Scenic Bike Routes in Vancouver: Unveiling a Curated List and App

The salty sea breeze, the backdrop of towering mountains, and the rhythmic whir of a bicycle chain – there’s nothing quite like cycling in Vancouver. Known for its commitment to green living and a penchant for outdoor activities, Vancouver is a haven for cyclists. But with so many routes to choose from, where does one begin? Enter our curated list and app for the most scenic bike routes in the city.

Benefits of a Curated Bike Route List/App

Embarking on a cycling journey, especially in a city as expansive as Vancouver, can be daunting. Our curated list and app aim to simplify this process by offering:

  • Convenience: No more scouring the internet or asking locals. Find all the top routes in one place.
  • Safety: We prioritize routes that are well-maintained, frequented, and safe for all levels of cyclists.
  • Local Exploration: Discover local cafes, art installations, and hidden gems along the routes.
  • Eco-Friendly Adventure: Promote a healthier lifestyle and reduce your carbon footprint, one pedal at a time.

A Closer Look at Vancouver’s Top Bike Routes

Stanley Park Seawall: Nestled alongside Vancouver’s iconic coastline, the Seawall is a dream route for every cyclist. Spanning approximately 9 kilometers, cyclists can revel in views of the Pacific Ocean, beaches, and lush greenery. The route is flat, making it suitable for beginners and families. Don’t forget to stop by the totem poles and enjoy a snack at one of the beachside cafes!

ALSO READ: Benefits of Wearing a Helmet When Biking: How to Pick the Right Bike Helmet For You

Pacific Spirit Regional Park: For those seeking an escape from the city’s hustle and bustle, the trails of Pacific Spirit offer a serene forested ride. Adjacent to the University of British Columbia, this park boasts over 54 kilometers of trails. While cycling, keep an eye out for the park’s diverse flora and fauna.

The Adanac Bikeway: A favorite among local commuters, the Adanac Bikeway offers a unique blend of urban and natural vistas. Connecting East Vancouver to Downtown, this route traverses various neighborhoods, each with its distinct character. While it’s a relatively easy ride, always be cautious of intersections and pedestrian crosswalks.

False Creek: Experience Vancouver’s vibrant urban side by cycling around False Creek. With views of the city skyline, Granville Island, and the Olympic Village, there’s no shortage of sights. Take a break, indulge in some local cuisine, or simply relax by the waterside.

Features of the App/List

Our user-friendly platform is packed with features:

  • Interactive Maps: Navigate with ease using our detailed maps.
  • User Reviews: Read experiences from fellow cyclists.
  • Ride Tracker: Document your journey and share it with friends.
  • Real-time Alerts: Stay updated with any route changes or events.
  • Augmented Reality: Engage with live information about nearby attractions, cafes, and more.

Engaging the Community

At the heart of every thriving city lies a robust community, and Vancouver is no exception. Our platform’s philosophy centers on this core belief: that the combined voices of individual members can culminate in a powerful collective. Local cyclists, who experience the city’s pathways every day, possess invaluable knowledge and insights that can’t be replicated. We not only encourage them to share these nuggets of wisdom but also actively foster a space where they can.

Collaborative Insights: We’ve created features on our app where cyclists can drop notes, suggest alternative routes, or even identify scenic spots for fellow riders. These user-generated tips add a personal touch, bridging the gap between technology and the human experience.

Organizing Rides: Unity in numbers! Local cyclists can use our platform to organize group rides, be it for casual weekend cruises or more intense training sessions. Such events not only promote fitness but also provide an avenue for cyclists to bond over shared passions.

Stories that Inspire: Our blog section celebrates the tales of everyday cyclists. From thrilling downhill escapades to tranquil morning rides, we give a voice to every journey.

Local Business Partnerships: Strengthening community bonds means supporting local enterprises. We’ve forged relationships with businesses around Vancouver, resulting in exclusive promotions, discounts, and offers tailored especially for our users. When you pedal around the city, know that a warm welcome awaits you at numerous stops.

Safety First

While the thrill of the wind against your face as you cycle is unmatched, it’s essential to ensure every ride is wrapped in the blanket of safety. Our platform doesn’t merely guide you through Vancouver’s scenic routes; it’s built with features ensuring that safety isn’t an afterthought.

Route-Specific Safety Tips: Vancouver’s diverse terrains mean that what works for one route might not for another. Whether it’s a hilly path, a busy city street, or a tranquil park, our platform offers specific safety guidelines tailored for each journey.

Designated Bike Lanes Information: Navigating the city becomes more comfortable with knowledge. Our app provides details on designated bike lanes, helping cyclists plan their routes better. Know where you’re protected, and where you’ll be sharing the road.

Emergency Contacts at Your Fingertips: In the unfortunate event of a mishap or if you find someone in need, time is of the essence. Our app has integrated emergency contact details, ensuring that help is just a tap away. This feature includes nearby medical facilities, local police stations, and even bicycle repair shops, ensuring you’re never truly alone on your journey.

Ride with joy, but more importantly, ride safe. Our commitment is to ensure every cycling adventure in Vancouver is both memorable and secure.

Conclusion

Cycling in Vancouver is more than just a mode of transportation; it’s an experience, a way to connect with the city. So, gear up, download our app, and embark on a two-wheeled adventure like no other!

Open post

Benefits of Wearing a Helmet When Biking: How to Pick the Right Bike Helmet For You

There are many benefits to wearing a bike helmet, and not just the fact that it can save your life. In this blog post, we will discuss 7 reasons why you should always wear a helmet when biking. We will also provide tips on how to pick the right bike helmet for you, and give you a list of some of the best helmets on the market today. So whether you are a beginner cyclist or an experienced rider, be sure to read on for information on staying safe while cycling!

7 benefits of wearing a helmet when biking

As a cyclist, you are susceptible to a variety of risks while riding. From cars passing too close to you on the road, to debris in the road that can cause you to lose control, there are many dangers that cyclists face every day. However, one of the best ways to protect yourself from these risks is by wearing a bike helmet. Bike helmets are designed to protect your head and brain in the event of a crash, and can potentially save your life. Here are ten benefits of wearing a helmet when biking:

  1. reduced risk of head injury: In the event of a fall or collision, a helmet can help to protect your head from being injured.
  2. better visibility: Helmets often have reflective materials that can make you more visible to drivers, especially at night.
  3. protects against the elements: Helmets can help to protect your head from the sun, wind, and rain.
  4. comfortable: Bike helmets are designed to be comfortable to wear, so you can focus on enjoying your ride.
  5. stylish: Gone are the days when bike helmets were bulky and ugly! There are now many stylish and trendy helmet options to choose from.
  6. affordable: Bike helmets are very affordable, and there are many budget-friendly options available.
  7. easy to find: You can find bike helmets at most sporting goods stores, as well as online.

As you can see, there are many reasons why you should always wear a bike helmet when riding. But how do you know which helmet is right for you? Read on for our tips on picking the perfect bike helmet!

How to pick the right bike helmet for you

There are a few things you should keep in mind when choosing a bike helmet. First, make sure that the helmet fits snugly but comfortably on your head. It should not be too loose or too tight. Second, look for a helmet that has been certified by the CPSC (Consumer Product Safety Commission). This certification means that the helmet meets certain safety standards. Third, choose a helmet that suits your riding style. For example, if you are an experienced rider who often goes off-road, you will need a different helmet than a beginner who only rides on paved surfaces. Lastly, make sure that the helmet you choose is comfortable and stylish! Here are some of our favorite helmets on the market:

The Best Bike Helmets for Every Type of Cyclist

Whether you are a casual rider or an experienced racer, there is a bike helmet out there that is perfect for you. In this section, we will recommend some of the best bike helmets on the market, based on your specific riding needs.

The Best Helmets for Biking

If you are looking for a great all-around helmet, we recommend the Giro Synthe MIPS Helmet. This helmet is lightweight and comfortable, and features an integrated MIPS system that helps to protect your brain in the event of a crash. It is also available in a variety of colors, so you can find one that suits your style.

For those who need a helmet specifically for racing, we recommend the Bell Z20 MIPS Helmet. This helmet is designed to be aerodynamic and lightweight, and features a MIPS system that helps to protect your brain in the event of a crash.

If you are looking for a budget-friendly option, we recommend the Schwinn Thrasher Helmet. This helmet is comfortable and stylish, and is available in a variety of colors. It is also very affordable, making it a great option for budget-conscious riders.

Whether you are a casual rider or a competitive racer, there is a bike helmet out there that is perfect for you. So get out there and enjoy the ride!

This concludes our blog post on the benefits of wearing a helmet when biking, as well as how to pick the right bike helmet for you. We hope that this information has been helpful, and that you will always remember to wear a helmet when riding! Stay safe out there!

Open post

Training Tips to Help You Become a Stronger Cyclist: How to Develop a Strong Cycling Training Plan

Do you want to become a stronger cyclist? If so, you’re in luck! In this blog article, our partners at Long Term Athlete Development will share training tips to help you improve your cycling performance. We will also teach you how to develop a strong cycling training plan that will help you increase your power and endurance on the bike. So what are you waiting for? Start reading now and prepare to take your cycling skills to the next level!

How to develop a strong cycling training plan

If you’re serious about becoming a stronger cyclist, then you need to develop a strong training plan. Here are a few tips to help you get started:

  • First, identify your goals. What do you hope to accomplish by completing this training plan? Do you want to increase your power output? Improve your endurance? Or both? Once you know what your goals are, you can start to develop a plan that will help you achieve them.
  • Next, create a schedule. How often do you want to train? What days of the week will you be able to commit to training? Make sure to give yourself enough time to rest and recover between workouts.
  • Finally, design your workouts. What type of exercises will you do? How long will each workout last? Remember to focus on quality over quantity – it’s better to do a few well-designed workouts than a bunch of random ones.

By following these tips, you’ll be well on your way to developing a strong cycling training plan that will help you reach your goals.

Do you have any other tips for developing a strong cycling training plan? Share them with us in the comments below!

ALSO READ: Cycling Clothing Tips for a Safe and Comfortable Ride

Training tips to help you become a stronger cyclist

If you’re looking to take your cycling skills to the next level, then follow these seven training tips. With a well-designed training plan, you can increase your power output, endurance, and overall strength on the bike. So what are you waiting for? Start reading now and get ready to become a stronger cyclist!

When it comes to developing a strong training plan, there are a few key things to keep in mind. First, identify your goals. What do you hope to accomplish by completing this training plan? Do you want to increase your power output? Improve your endurance? Or both? Once you know what your goals are, you can start to develop a plan that will help you achieve them.

Next, create a schedule. How often do you want to train? What days of the week will you be able to commit to training? Make sure to give yourself enough time to rest and recover between workouts.

Finally, design your workouts. What type of exercises will you do? How long will each workout last? Remember to focus on quality over quantity – it’s better to do a few well-designed workouts than a bunch of random ones.

By following these tips, you’ll be well on your way to developing a strong cycling training plan that will help you reach your goals. Good luck!

Do you have any other tips for developing a strong cycling training plan? Share them with us in the comments below!

How to develop strong cyclist’s legs

If you want to become a stronger cyclist, then you need to focus on developing strong legs. Here are a few tips to help you get started:

  • First, identify which muscles you need to focus on. The majority of your power will come from your quads, hamstrings, and glutes. So make sure to include exercises that target these muscle groups in your training plan.
  • Next, create a schedule that includes both aerobic and anaerobic workouts. Aerobic exercise will help you build endurance, while anaerobic exercise will help you develop explosive power. By including both types of workouts in your plan, you’ll be able to build both strength and endurance.
  • Finally, focus on quality over quantity. It’s better to do a few well-designed workouts than a bunch of random ones. So make sure you’re using proper form and technique when you’re performing your exercises.

How to increase power on the bike

There are a few key things you can do to increase power on the bike. First, make sure you have a proper bike fit. This means that the saddle is at the right height and that you can reach the pedals comfortably. second, focus on pedaling technique. Make sure you’re using your whole leg to pedal and that you’re not stalling out at the top or bottom of the stroke.

Finally, make sure you’re using the right gear ratio for the terrain you’re riding on. If you’re constantly shifting gears, you’re not going to be able to maintain a high level of power. By following these tips, you’ll be able to increase power on the bike and ride faster and more efficiently.

By following these tips, you’ll be well on your way to developing strong legs that will help you become a stronger cyclist. Good luck!

Open post

5 Ways to Reduce Road Accidents and Make Your Cycling Commute Safer

Bicycles are becoming an increasingly popular way to commute to work, and for good reason – they’re environmentally friendly, cost-effective, and a great form of exercise. However, cycling on the roads can be dangerous if you’re not aware of the dangers posed by cars and trucks. In this blog post, we will discuss 5 ways to reduce road accidents and make your cycling commute safer.

5 ways to reduce road accidents

Stay visible – Make sure you’re always visible to drivers, wearing bright clothing during the day and using lights at night.

Obey the traffic laws – Always obey traffic signs and signals, and ride in the same direction as traffic.

Use bike lanes when available – Riding in a bike lane makes you more visible to drivers and reduces the chances of being hit by a car.

Be aware of your surroundings – Always be aware of what’s going on around you, and stay alert at all times.

Stay calm – If you find yourself in a dangerous situation, try to remain calm and take evasive action if possible.

Why is it important to have bicycle lanes?

Bicycle lanes make it easier for cyclists to share the road with vehicles and reduce accidents. They also provide a safe space where cyclists can ride without worrying about being hit by cars or trucks, which makes them less likely to get into an accident in the first place. It’s also worth noting that bike lanes are a great way for cyclists to get around town without having to worry about traffic congestion.

Why you should bike to work?

Biking is good for your health, the environment and your wallet! Cycling can help reduce stress by providing an outlet for physical activity that doesn’t involve sitting down all day long. It’s also a fun way to explore your city or town, as well as getting some fresh air and sunshine.

  • Save money on gas and car maintenance
  • Get exercise and fresh air on your way to work
  • Reduce your carbon footprint
  • Help reduce traffic congestion
  • Meet new people and make friends with other cyclists

Why cycling infrastructure is so important?

Cycling infrastructure is a set of policies, programs and facilities designed to promote the use of bicycles in an area. These include bike lanes on roads, off-street paths like those found at parks, dedicated cycleways and parking facilities for bikes.

What is the best infrastructure for your cycling business?

The best infrastructure for a cycling business will depend on its location, size and budget. For example, if you’re running a small bike shop in an urban area with limited space then it’s probably not necessary to have dedicated cycleways or parking facilities because there will be plenty of public transport options nearby. It’s also worth noting that some cities have designated bike lanes which can make getting around town much easier, especially during rush hour when traffic is heavy.

  1. Decide if you need a physical store or if you can run your business solely online
  2. If you have a physical store, choose the right location and make sure it’s accessible to cyclists
  3. Invest in quality cycling equipment and apparel to set your business apart from the competition
  4. Create an engaging website that showcases your products and services
  5. Make sure you have a strong social media presence to reach more potential customers

5 ways to make your cycling commute safer

  1. Wear brightly colored clothing so that drivers can see you
  2. Make sure your bike is in good condition and properly tuned up
  3. Use reflective tape or lights on your bike for visibility at night
  4. Ride with traffic, not against it
  5. Obey all traffic laws and signals
Open post

15 Cycling Clothing Tips for a Safe and Comfortable Ride

Cycling is a great way to get around in a new city. You can see so much more when you’re on two wheels, and it’s a lot more fun than walking! However, if you’re not used to cycling in cold weather, it can be dangerous. In this blog post, we will give you tips on how to dress for a safe and comfortable ride. We’ll also tell you about some of the best cycling clothes and accessories on the market today. And finally, we’ll give you some ideas on things to do when you don’t know anyone in your new city!

Best clothes to wear when riding a bike

There are a few things you need to consider when choosing clothes for cycling. First, the fabric should be breathable so that you don’t get too hot. Second, it’s important to choose clothes that fit well and won’t flap in the wind. And finally, make sure that all of your clothes are made from non-flammable materials, especially if you’re cycling in the city.

Here are a few tips on what to wear when riding a bike:

  • Wear clothes that fit well and won’t flap in the wind. Shirts with short sleeves or jerseys are a good choice.
  • Make sure all of your clothes are made from non-flammable materials.
  • Wear a helmet to protect your head in case of an accident.
  • Wear sunglasses to protect your eyes from the sun and wind.
  • Wear sunscreen to protect your skin from the sun’s rays.
  • Drink plenty of water to stay hydrated.

How to ride in the cold

If you’re cycling in the cold, it’s important to dress appropriately. Here are a few tips:

  1. Wear layers of clothing so that you can adjust your temperature as needed.
  2. Make sure your clothes are waterproof and windproof.
  3. Wear a hat and gloves to keep your head and hands warm.
  4. Drink plenty of water to stay hydrated.

How to pick the best cycling clothes and accessories

There are a lot of different cycling clothes and accessories on the market today. How do you know which ones are the best? Here are a few tips:

  • Choose clothing that is made from breathable, lightweight materials.
  • Choose clothing that fits well and won’t flap in the wind.
  • Choose accessories that are made from durable, weatherproof materials.
  • Choose a helmet that is comfortable and fits well.

What clothes to choose when riding a bicycle in summer

If you’re cycling in the summer, it’s important to dress appropriately. Here are a few tips:

  • Choose clothes that are made from lightweight, breathable materials.
  • Choose clothes that fit well and won’t flap in the wind.
  • Wear sunglasses to protect your eyes from the sun and wind.
  • Wear sunscreen to protect your skin from the sun’s rays.
  • Drink plenty of water to stay hydrated.

15 things to do with your friends when you don’t know anyone in the new city

  1. Check out the local sights and attractions.
  2. Visit a museum or art gallery.
  3. Take a walk through the park or botanical gardens.
  4. Have a picnic in the park.
  5. Visit a local landmark or tourist attraction.
  6. Take a bike ride through the city.
  7. Check out the local restaurants and cafes.
  8. Go for a swim at the beach or pool.
  9. Explore the local nightlife.
  10. Attend a festival or concert.
  11. Join a walking tour of the city.
  12. Take a day trip to a nearby town or city.
  13. Visit a local winery or brewery.
  14. Go for a hike in the local hills or mountains.
  15. Shop till you drop!

We hope these tips have helped you dress safely and comfortably for your next cycling adventure! Stay safe and have fun! 🙂

Posts navigation

1 2
Scroll to top